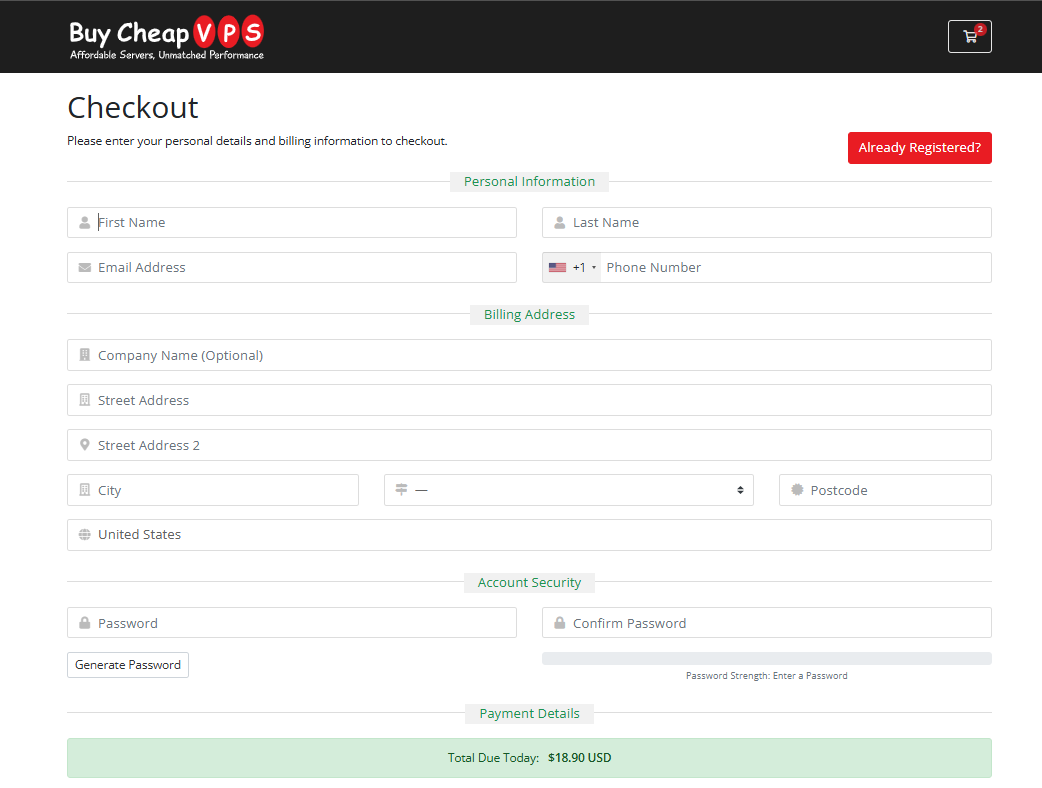
Step 01: Choose Your Package Category
Visit our website and navigate to VPS Hosting from the menu. You will see a list of available categories:
- Linux VPS
- Windows VPS
- Container VPS
- Storage VPS
Select the category that best suits your needs.
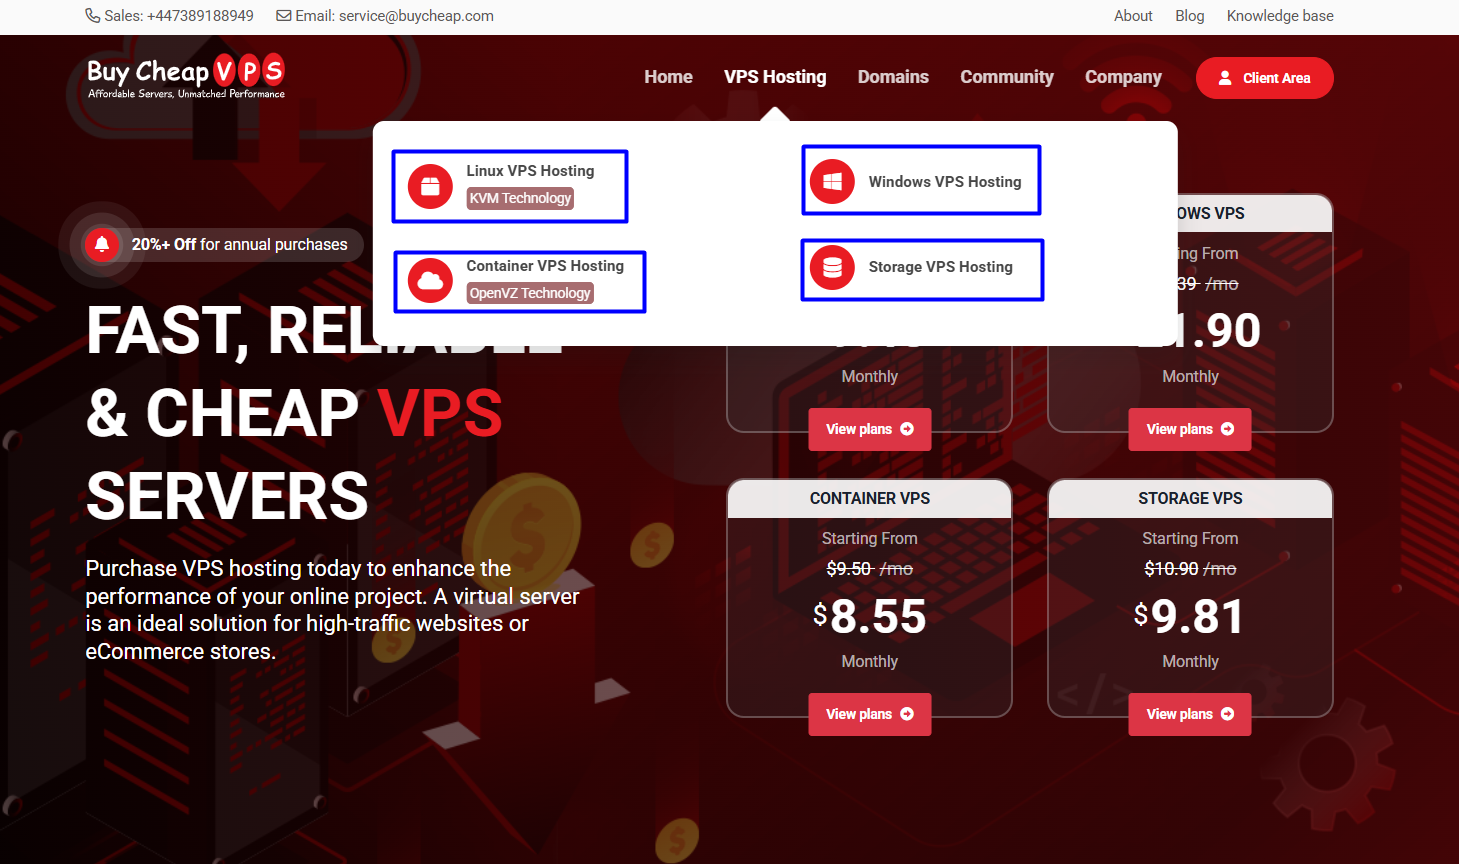
Step 02: Select Your Package
Once you choose a category, you’ll see the available VPS packages along with their specifications. You can select a billing option:
- Monthly
- Annually
After selecting your preferred package, click Add to Cart to proceed.
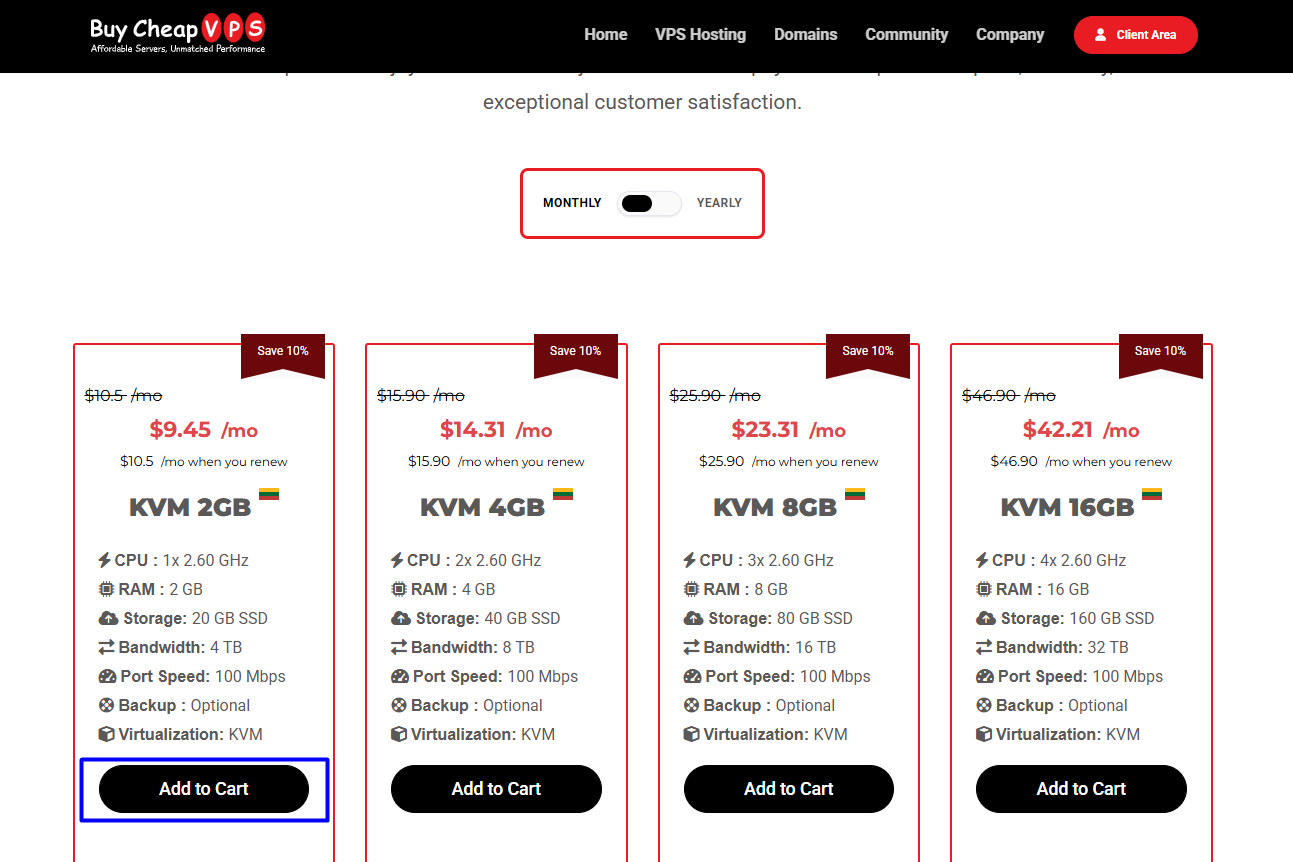
Step 03: Configure Your Server
After adding the package to your cart, you'll be redirected to the Server Configuration page. Here, you can:
- Review the selected server specifications
- Choose your billing cycle
- Customize additional server configurations
- Add optional software addons
- View the total cost
Once you’ve finalized your configurations, click Continue to proceed to the order review.
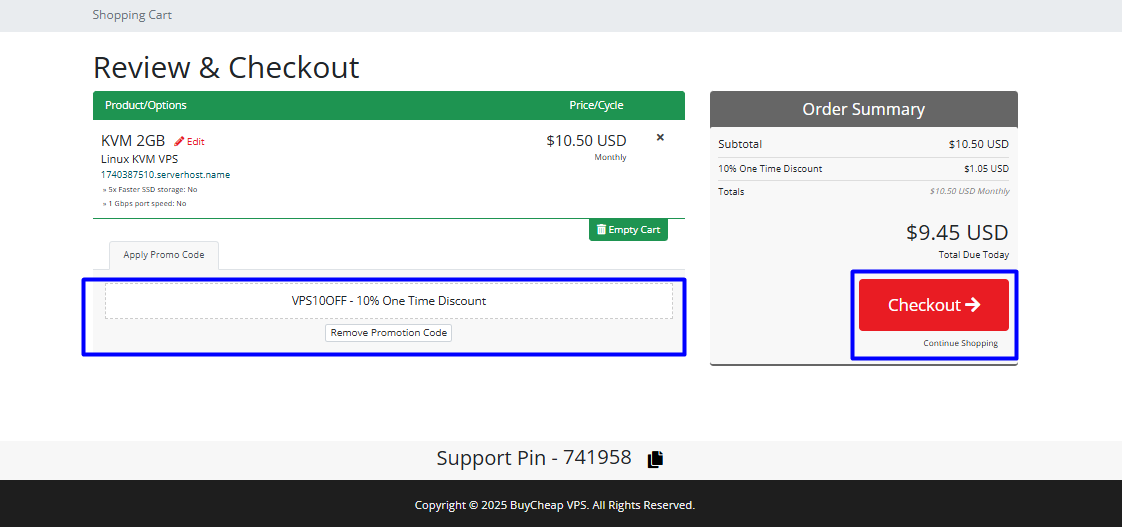
Step 04: Review & Apply Discounts
On the Review & Checkout page, you can:
- Apply a promo code (if available)
- Estimate any applicable taxes
- Review your total charges
Once everything looks good, click Checkout to continue.
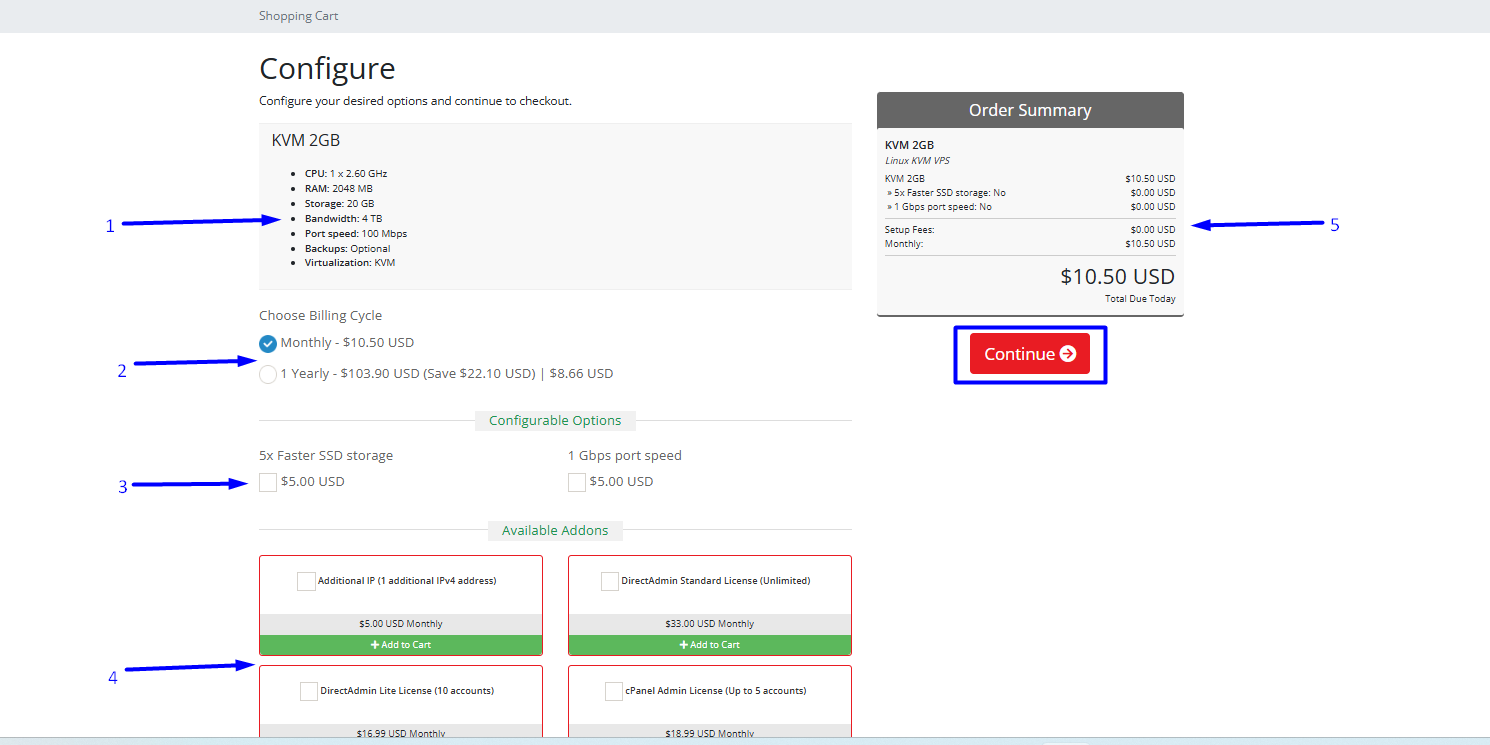
Step 05: Complete Your Purchase
On the Checkout page, enter your personal details, billing information, and payment details.
- If you already have an account, click Already Registered? and log in.
- If you're a new user, complete the form to create your account.
After completing the checkout process, you will receive an invoice. Follow the payment guidelines provided to finalize your order.
